Landscaping adds a finished touch to a home like nothing else can. Beautiful hedges, flowering perennials and neatly edged gardens complete the exterior of a home. Landscaping on a budget begins with the knowledge that you'll be doing your own work. Hiring a contractor to beautify your backyard offers a beautiful landscape and an empty wallet. You'll need to arm yourself with knowledge about landscaping, soil preparation and the best plants for your area to create a plan for the ideal backyard landscape.
Creating a Plan
- Grab a piece of graph paper and sketch out your home exterior, including any permanent features. If you have a plan, you'll be able to control the spending. Backyard landscaping often presents difficulties with design and expense because of the increased amount of space. Focal points can be just about anything from a pool to a special tree or plant, a wooden deck or patio. Choosing a center point helps with symmetrical design, as well as limiting the expense of plants and shrubs.
Choosing a few types of plants and scattering these throughout the landscape creates a sense of unity to the backyard. In the same vein, choose three to four colors of flowering annuals or perennials for a sense of continuity. Vary heights of plants in a single garden with tallest at the center or back, working by height to the lowest plants in the front. This gives the illusion of many plants in the garden. If you've got a fence, don't assume you need to line the fence with a long rectangular garden. Save money and create a pleasing landscape by simply creating an irregularly shaped garden in the corner of the fence.
Choosing Plants
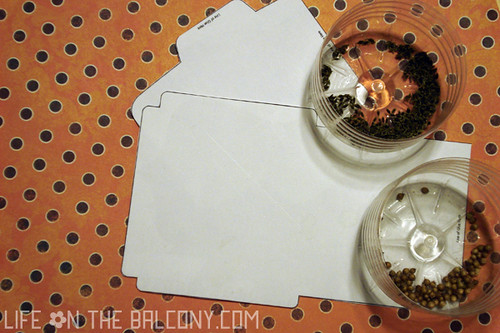
 Variegated hosta. Plants often overwhelm new landscapers with choices and decisions. Landscaping tends to be a rather permanent addition to your home, so you want to do it right the first time. Consult with your local garden center for recommendations before making any purchases. Always read the attached information tab on every plant for sale. These cards provide planting information, sunlight requirements and watering recommendations. Save money and time by doing research to choose the best plants for your backyard.
Annuals offer immediate color but only last one season. Perennials and shrubs bloom year after year and often expand in size. This expansion often results in thinning, which creates more plants that will need a home in your backyard. Keep propagation in mind when initially purchasing plants. Plants can be quite expensive, but it lessens the punch a little when you realize you'll get more than one plant out of a gallon pot.
Choose plants that grow best in your area and limit the number of chosen plants. Although your garden might seem sparse the first year, new growth and expansion will use up those blank spaces quickly. Add any choices to your backyard design plan. Make sure you take into account any soil conditions, as well as shade/nonshade areas before making any plant purchases.
Soil Preparation, Mulch and Edging
- Consider any purchased plant an investment that needs a proper place to thrive. Most likely, your backyard is unconsolidated fill dirt put in place by the builder. Soil preparation will help protect your investment and should be figured into your landscape budget. Add soil conditioners, such as peat moss and compost, by simply dumping these products into the garden area. Turn over the top 12 inches of soil with a rototiller or by hand.
Mulch adds a finished look to any landscape and aids your plants by retaining water. Mulch has the added benefit of suppressing weed growth. Bags of mulch cost about $3 (sometimes less on sale), and you just can't beat this addition for creating a groomed look to your backyard. This investment also helps over time as the mulch breaks down and enriches the soil. Edging around the gardens also adds a finished look to the backyard and helps retain the mulch inside the garden. Garden borders come in many materials, such as plastic, wood or more expensive stone. http://www.ehow.com/way_5272329_backyard-landscaping-budget.html


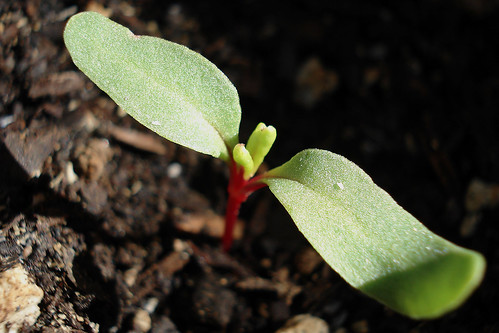

 A great way to save money and take care of your health is to have your own herb garden. You can actually learn how to grow your own food and make it available for you anytime.
 Whether you’re trying to pinch pennies on your grocery bill or just hungering to eat healthier, having your own edible garden is the answer. The beauty of tending a backyard vegetable patch is that you can pick and choose what to grow, allowing you to customize a mix that suits your family’s palate—and gives you the greatest return on investment.
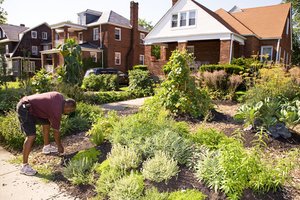 Edible gardens aren't just good for your health, they're also good for your wallet--a well-maintained garden can yield a half-pound of fresh vegetables for every square foot of garden space. Image: Edible Estates/Fritz Haeg/www.edibleestates.org