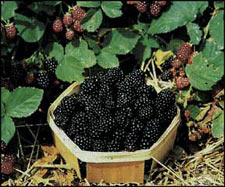
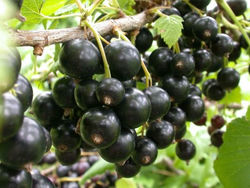
Showing posts with label Berries. Show all posts

Wednesday, August 8, 2012

Дерево чёрной смородины

Дерево чёрной смородиныЧерная смородина по праву считается одной из самых популярных и любимых садовых культур. Большинство людей считает, что черную смородину нужно выращивать кустами. Однако, есть и другой способ содержания этой культуры. Речь идет о формировании черносмородинных деревьев. На мой взгляд, этот способ имеет множество преимуществ перед традиционным кустовым. Как это выглядит на практике?
Куст черной смородины состоит из множества стволиков. Каждый из них вполне самостоятелен, так как имеет собственную корневую систему. Но все стволики появились из одного общего корня, поэтому должны довольствоваться весьма малым «жизненным пространством». Несмотря на близкое родство, они вынуждены бороться друг с другом за элементарное выживание. Ожидать при этом небывалых урожаев – примерно так же наивно, как рассчитывать, что десяток пауков в одной банке будут проявлять друг к другу трогательную заботу, нежность и взаимоуважение, станут делиться последней пойманной мухой.
Иное дело, когда побег смородины получает достаточную для своего максимального развития площадь земли. Тогда растение образует мощную корневую систему, крепкий стволик, развитую структуру скелетных и плодовых ветвей. Но этого не добиться простым рассаживанием молодых побегов из общего куста на собственные, достаточно удаленные друг от друга места. В этом случае от корней таких отдельных растений неизбежно вырастут новые побеги, и в результате все равно образуются кусты. Чтобы этого не произошло, требуется несложная подготовка и выращивание черенков.
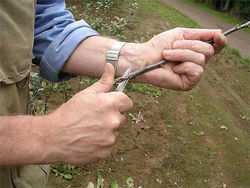
Дерево чёрной смородиныЗаготавливать черенки следует ранней весной, при набухании почек, но до появления листьев, из однолетних побегов. Для черенкования годятся верхние части растения, где имеются почки, но нет ветвей. Длина черенка может быть различной, и сначала заготовку отрезают секатором или ножом с некоторым запасом. При формировании черенка нужно учитывать, что его нижняя треть будет закопана в землю при посадке, а на той части, которая останется над землей, нужно оставить 3-4 почки. Из каждой такой почки потом вырастет скелетная ветвь, а сам черенок превратится в стволик дерева. Поэтому надо следить, чтобы оставляемые почки находились с разных сторон черенка, чтобы в будущем скелетные ветви были расположены правильно, не оказались все с одной стороны растения. Лишние, не нужные, почки прищипываются или аккуратно срезаются. Вершинка черенка должна непременно отсекаться.
В качестве череночника можно использовать как грядку, так и просто ровный участок земли, вскопанной и выровненной граблями. На гряде черенки высаживаются рядками, с расстоянием между растениями 10-15 см, и между рядами примерно 20-25 см. На площадке расстояние между растениями делают таким же, но между рядами оставляется проход в 40-70 см. Это связано со способом прополки. Например, на грядах обычно проводят ручную прополку, а на площадке – прополку междурядий с помощью ручного культиватора. При небольшой потребности в материале годятся оба способа, а при закладке череночника для коммерческой плантации или для торговли саженцами предпочтительнее использовать площадку, В этом случае легко делать прополку ручным культиватором или каким-то средством малой механизации, что в несколько раз повышает производительность труда.
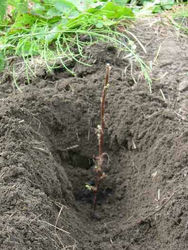
Дерево чёрной смородиныКаждый черенок заглубляется в землю комлевой частью, примерно на треть своей длины. Земля вокруг посаженных черенков должна сразу же уплотняться и хорошо проливаться водой. При этом исключается доступ воздуха к подземной части растений и увеличивается процент приживаемости. Весьма полезно накрывать череночники специальным нетканым материалом. Такой материал хорошо пропускает внутрь солнечные лучи и дождевую воду, но влагу и тепло отлично удерживает внизу, под собой. В таком случае приживаемость черенков может достигать 100%. Когда на саженцах появляются веточки из оставленных почек, а на них начинают расти листья, что говорит о достаточном развитии корневой системы, надобность в укрывном материале отпадает.
В дальнейшем уход за череночником не представляет собой ничего сложного. Требуется лишь проводить периодические прополки и полив. Как только на черенках появятся из почек веточки, что является признаком достаточного развития корневой системы, потребность в укрывном материале отпадет. Растения с этого времени лучше будут развиваться без всякого укрытия. К моменту осеннего опадания листьев на каждом саженце должно быть по 3-4 веточки, по количеству оставленных на черенках к моменту их посадки. Если на каких-то растениях количество веточек меньше трех, то такие саженцы должны выбраковываться. В зиму череночники не следует укрывать и утеплять. Смородина – весьма зимостойкое растение, и обычно хорошо переносит даже сильные морозы.
На перезимовавших саженцах весной необходимо провести обрезку для окончательного формирования растений. Эта операция проводится до распускания листьев. На каждой боковой веточке оставляется 3-4 почки, остальное отсекается. Из каждой оставленной почки вырастет плодовая ветвь, на которой и будут появляться многочисленные грозди крупных ягод. Сразу же после обрезки растения нужно или пересадить на постоянные места, или готовить к реализации на рынке, в зависимости от предназначения питомника. Саженцы осторожно выкапывают, стараясь не повредить корней, и пересаживают на заранее подготовленные места в той части сада или огорода, где им предстоит находиться до окончания срока своей службы.
Дерево чёрной смородиныПри посадке саженцев на новое место нужно следить, чтобы основания стволиков не оказались излишне заглублены ниже уровня почвы. Если это произойдет, то замедлится развитие растений и снизится урожай. Поэтому будет лучше допустить такое положение саженцев, когда после пересадки они окажутся как бы на небольших бугорках. После посадки саженцев землю вокруг них надо хорошо уплотнить и обильно пролить водой, чтобы мокрая земля плотно облепила корни. Воздух, проникающий к корневой системе весьма вреден, он сушит корни и может быть причиной замедления роста растений.
Расстояние между саженцами, после их пересадки на постоянные места, должно быть не менее 2,5 метров. Саженцы еще не велики, и такое расстояние может показаться чрезмерным. Однако надо учесть, что после полного отрастания скелетных, а затем и плодовых ветвей, смородинные деревца будут весьма раскидистыми. Чтобы в дальнейшем не возникало затруднений с прополкой, поливом, сбором урожая и другими работами, лучше сразу обеспечить необходимый простор.
Ко второй осени, с момента посадки черенков, уже сформированы толстые стволики, скелетные и плодовые ветки. В таком виде растения уходят на вторую зимовку, чтобы со следующего лета обеспечить владельцев первым урожаем.
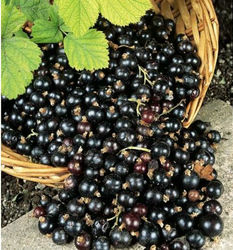
Дерево чёрной смородиныНа третий год деревца дают первый урожай. Он еще не велик, составляет всего от трех до пяти килограммов ягод. Но уже заметно, что сами ягоды очень крупные, и по качеству превосходят те, что выросли на кустах, с которых были взяты черенки. Это объясняется лучшими условиями развития, которые были предоставлены саженцам деревцев в сравнении с условиями произрастания стволиков в кустовом варианте. Могучая корневая система деревцев способна в изобилии обеспечить ветви, листья и плоды питательными веществами и влагой, поэтому количество и размер ягод на плодовых ветвях очень и очень впечатляет. Многие ягоды кажутся поистине гигантскими.
С пятого года произрастания деревца смородины начинают давать максимальные урожаи, от восьми килограммов с одного растения. До восьмилетнего возраста деревца обильно плодоносят, затем урожаи начинают снижаться. Поэтому, занимаясь выращиванием черной смородины в виде деревьев, желательно периодически закладывать череночники. Тогда будет возможность на место выкорчеванных восьмилетних растений сразу же помещать новые саженцы.
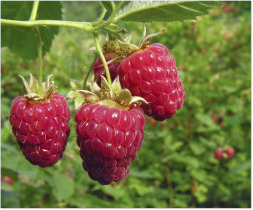
Уже в четырехлетнем возрасте смородинные деревца весьма впечатляют. В высоту они редко превышают 1,5 метра, но зато очень раскидисты. Накануне сбора урожая гроздья ягод представляют собой сплошную бахрому на нижней части плодовых ветвей. Вес урожая весьма велик, ветви сильно прогибаются, и их концы могут касаться земли. Тогда происходит следующее. В месте соприкосновения ветви с землей образуются корни, и начинает развиваться новое растение. Чтобы такого не случилось, под провисшие ветви либо ставят подпорки, либо их концы просто отсекают.
Смородинные деревца очень декоративны, поэтому могут служить не только для получения больших урожаев прекрасных ягод (которые учеными признаны самыми полезными из всех), но и для украшения усадьбы. Действительно, эти деревца весьма красивы и имеют необычный вид. Невысокий стволик толщиной в руку, толстые скелетные и на столь массивные, но длинные и ветвистые плодовые ветви, украшенные как резными листьями, так и огромным множеством гроздей с очень крупными ягодами – такой вид растения может служить украшением любой усадьбы, не говоря уже о практической пользе от урожая. А тем садоводам, которым выращивание саженцев растений для продажи служит средством основного или побочного дохода, черносмородинные деревца могут послужить отличным товаром для реализации.
Автор - Антонов Иван Александрович.
Источник - seloidacha.ru/?page id=385

Monday, May 23, 2011

Красная смородина: 100 кг с трех “квадратов”


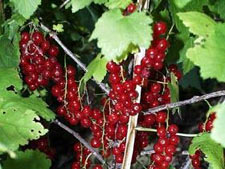
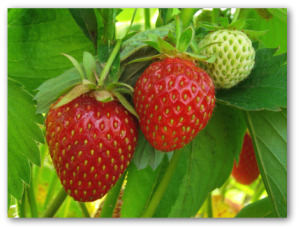
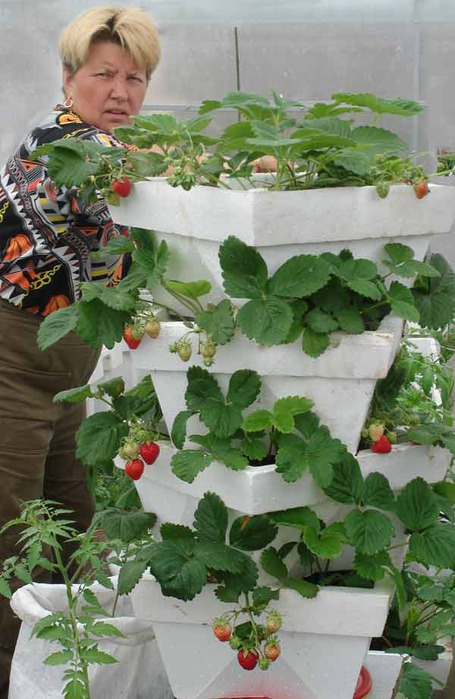
Вот уже без малого 20 лет живут в моем саду три куста красной смородины. Растут почти без ухода. В хорошее лето дают до трех ведер, а в плохое - до полведра ягод с куста.

Садовая Золушка

Собираешь урожай и думаешь - есть ли еще какая-нибудь ягодная культура, в которую природа заложила такую живучесть и неприхотливость? Все ей, красной смородине, нипочем. Придут заморозки, поморозят все ягодники в саду. А на ее кустах лишь плоды помельчают, да количество ягод в кисти поубавится. Засуха погубит на корню урожай садовых культур. Но красная смородина уходит и от этой напасти. Ее корни глубже проникают в землю, доставляя живительную влагу кустам. Крыжовник и черная смородина страдают от клеща и мучнистой росы. А “красненькой” не страшны и эти “оккупанты”. К тому же ее ветви способны плодоносить до 10 лет без всяких признаков старости. В то время как другие садовые растения просто не хотят давать урожай без регулярной обрезки.
Но всякая медаль имеет свою оборотную сторону. Так и здесь - живучесть и неприхотливость “красненькой” разбаловали садоводов. Дачники обычно сажают бедняжку где-нибудь на отшибе участка и ухаживают за ней в самую последнюю очередь. Да и кушать предпочитают землянику, малину, вишню. До красной смородины дело обыкновенно и не доходит. Редко кто сорвет одну-две кисточки да положит в рот. Остальные ягоды без сожаления пускают на переработку. И это - в лучшем случае, если птички не “помогут” собрать урожай. Пернатые не столь привередливы. Поклевать красные ягодки они очень даже не прочь.
Красная смородина - это Золушка нашего сада. Но не нужно забывать, чем закончилась известная сказка Шарля Перро. В один прекрасный день Золушка превратилась в принцессу. Возможно, такая же участь со временем ожидает и красную смородину.

Русский парадокс

Многие читатели слышали о так называемом “французском парадоксе”. Яблоки, апельсины едят повсеместно во всей Европе. Все европейцы пьют консервированные соки в больших количествах. И только французы употребляют много молодого, непастеризованного красного вина, приготовленного из винограда. И живут они на добрый десяток лет дольше.
Как врач, я смело могу утверждать, что вино из красной смородины даже более целебно, чем виноградное. И по вкусовым качествам оно ничуть не уступает последнему. А приготовить его куда дешевле и проще.
Три куста смородины, о которых шла речь в начале статьи, растут в моем старом саду. Поэтому я за ними особо не ухаживаю. На ухоженном же участке “красненькая” дает урожай выше, чем виноград на юге Франции.
Не все знают, что ягоды современного сорта красной смородины Нива набирают сахар в любое холодное лето, ничуть не уступая в этом отношении винограду. Каротина в красной смородине не меньше, чем в моркови. А по содержанию пектинов ей и вовсе нет равных. Именно пектины выводят из организма излишки холестерина и соли тяжелых металлов.
Мы говорили о французском парадоксе. Русский же парадокс, на мой взгляд, состоит вот в чем: самая дешевая, урожайная и целебная культура растет у нас в каждом саду без исключения. Но мы не умеем и не хотим ее правильно использовать. Кусты “живут” на дачах по 10-15 лет почти необрезанные. Солнце годами не заглядывает в центр такого “щита”. Понятно, сколько там вредителей и болезней. Ягоды поражаются гнилями, мельчают, собирать их становится трудоемко и неприятно.

Вика и Натали

Несколько лет назад мне посчастливилось приобрести современные московские сорта красной смородины - Натали, Сахарная, Розе чаер. Ухаживал за ними не на страх, а на совесть. Растения сторицей отблагодарили меня за такую заботу. Посмотришь на них - одно загляденье! Кисти длинные, плотные, ягоды крупные и очень сладкие. У Розе чаер они красно-коричневые, с оригинальным ореховым привкусом. Дети ласково называют их “шоколадками” и едят не хуже, чем малину. А вот у Сахарной плоды розового цвета. Кусты никогда ничем не болели.
Затем я приобрел два технических сорта - Валентиновка и Лидер. Они отличаются богатой урожайностью и очень высоким содержанием пектина. До того, как увидел собственными глазами, никогда и предположить не мог, что у красной смородины могут быть кисти до 17 см в длину. Сорта позднего срока созревания. Ягоды не осыпаются, собирать урожай можно практически в любое время. На вкус плоды кисловаты, но мармелад и желе из них - просто чудо.
А вот вино лучше все-таки готовить из сладких сортов. И я такие нашел. Это очень ранний сорт Вика, средний - Нива и поздний - Баяна. Последний выделяется светло-кремовыми плодами. Вика же "щеголяет" темно-красными ягодками.
Смотрят соседи и удивляются. Никто поверить не может, что это смородина. В крупных ягодах на длинных кистях - никакой кислоты, сплошной сахар. Кусты морозостойки, скороплодны и устойчивы к болезням.

Солнечная шпалера

С куста смородины я собирал три ведра ягод. Показалось - мало. Пришлось разработать специальную технологию: как с небольшого участка (3 X 3,5 м) получить более 100 кг плодов.
Конечно, такие результаты достижимы лишь при работе с хорошими, современными сортами. У старых сортов основная масса цветочных почек располагается на концах веток. Поэтому обрезать их нельзя. В то же время “посередке” веточка почти голая. Оттого и урожай мал.
У современных же скороплодных сортов урожай сосредоточен в основном на плодовых веточках и кольчатках. Стало быть, “растянут по всей длине”. Если у черной смородины такие ветки живут всего три года, то у современных сортов красной - 10 лет. А отсюда вывод - чем больше на кусту “плодушек” и кольчаток, тем богаче будет урожай.
Теперь - о самой технологии. Я устанавливаю четыре шпалеры трехметровой длины на расстоянии 70 см друг от друга. В августе просто втыкаю черенки в хорошо удобренную землю. Посадку провожу густо - через 30 см в ряду. Всего приходится по 10 растений на одну шпалеру. В дальнейшем регулярно поливаю кустики. Укореняются современные сорта красной смородины на все сто.
Куст формирую так. Весной удаляю все побеги, кроме одного, самого сильного. К концу июня он отрастает на 50 см, и я прищипываю верхушку. Таким образом задерживаю его рост, стимулируя тем самым закладку цветковых почек уже у однолетнего побега. В это же время выщипываю все почки внизу, формируя штамб высотой 25 см. Далее оставляю один сильный побег продолжения, прищипывая остальные над четвертым листом. Важно в течение всего этого периода подкармливать растения жидкой органикой с добавлением суперфосфата и калия. В теплое лето еще 1-2 раза прищипываю верхушки и боковые ветки по той же схеме. К осени куст вырастает до метра. Он уже полностью сформирован. На следующий год подарит урожай - до 300 г спелых и сочных ягод.
На второй год жизни кустик подрастет еще на полметра. В течение лета я снова 1-2 раза прищипываю верхушку и боковые побеги. Теперь это необходимо для того, чтобы смородина не была перегружена урожаем. Иначе у нее останется мало сил на рост и развитие.
На третий год куст уже не дает практически никакого прироста. А урожай с одной ветки, сформированной по описанной технологии, может возрасти до 3 кг. Оптимальное количество таких веток на погонный метр шпалеры - 7-10. Это значит, что на втором году я на каждом кустике оставляю еще по одному нулевому побегу, формируя его точно также и подвязывая рядом с основным. А на третий год, если осталось свободное пространство, выгоняю еще и третий побег. Шпалера теперь “утрамбована” до предела - заполнена сплошной плодоносящей стеной. В то же время каждая ягодка всегда под солнцем и под рукой. Собирать урожай легко, ухаживать за кустами приятно. Трудоемкость ухода возрастает раза в два. Зато урожайность увеличивается раз в десять.
В мае, как известно, бывают заморозки. Согласитесь, что укрыть покрывалом из лутрасила квадрат из шпалер 3X3 м гораздо легче, чем отдельно стоящий раскидистый куст.

Заготовки из “красненькой”

У каждого члена моей семьи есть любимый деликатес из красной смородины. Жена обычно готовит мороженое ассорти из различных ягод. Теща по старинке предпочитает разноцветный мармелад и желе. А невестка делает настоящее лакомство для детей. Вымытые кисти обмакивает во взбитый белок, посыпает сахарной пудрой и быстро высушивает в микроволновке.
А я тем временем нудно поучаю своих домашних, что консервированные ягоды - это уничтоженные витамины. По-настоящему целебны только свежий сок или молодое вино. А в самих ягодах самое полезное - это косточки и кожура. Отжимки плодов я высушиваю, зимой смешиваю с сушеным шиповником и сладкой рябиной. Перемалываю в кофемолке, настаиваю в термосе при температуре не выше 45оС. Дети пьют охотней, чем лимонад. Попробуйте и вы. Может быть, разучитесь ходить в магазины за прохладительными напитками.
Геннадий Федорович РАСПОПОВ
Новгородская обл., г. Боровичи
  http://www.cofe.ru/garden/article.asp?article=8087&heading=47

Tuesday, May 10, 2011

Земляника в пирамидках,уход.

В этом году решила серьезно заняться клубникой и земляникой. Решила сделать пирамидку земляничную и клубничную,чтобы прикрыть неприглядные еще пейзажи нашего новенького сада,перечитала много чего.Краткое изложение: 1 У нас,на Урале,точно- вымерзнет,так,что настраиваться нужно как на однолетник. 2 Делать можно какие угодно пирамидки-главное,чтобы хорошо поливалось и освещалось. Если пирамидка высокая,лучше в середину вставлять трубу с отверстиями,через которую идет полив  (300x280, 27Kb) 
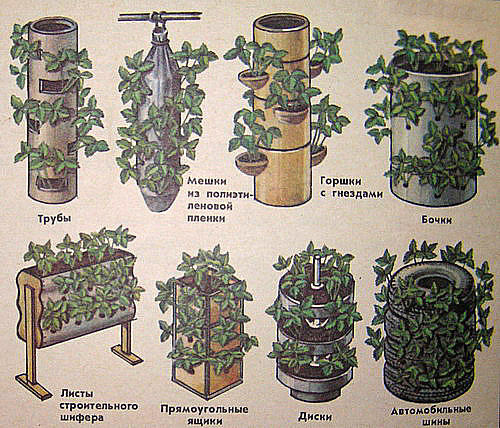
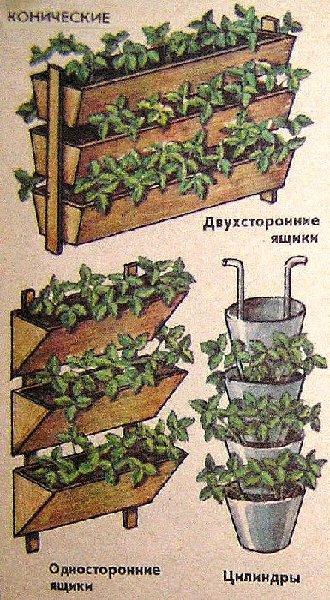
3 Хорошая, удобренная земля. Пирамидкой можно замаскировать кучу строительного мусора,или компоста. Еще из плюсов - удобно обрабатывать от вредителей,собирать урожай,меньше поражается гнилью. А теперь фото из интернета для воодушевления!!!


земляника
 (699x464, 140Kb)

 (500x375, 75Kb)
 (275x350, 34Kb)
 (200x300, 50Kb)  (600x450, 68Kb)  (500x428, 117Kb)  (330x600, 85Kb) 
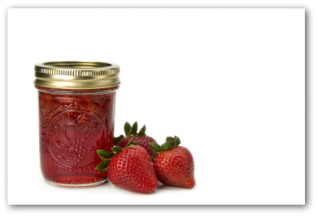
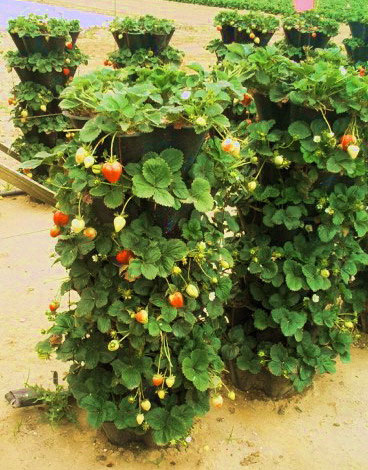
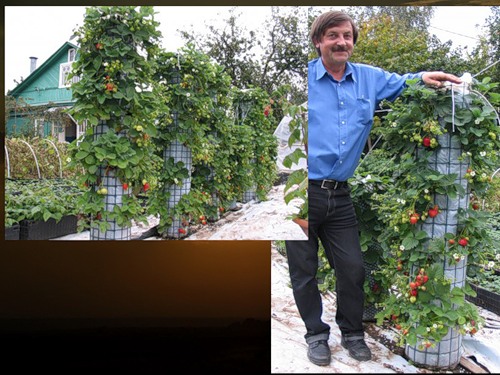
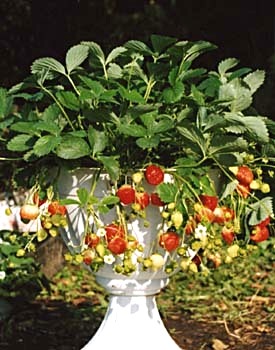
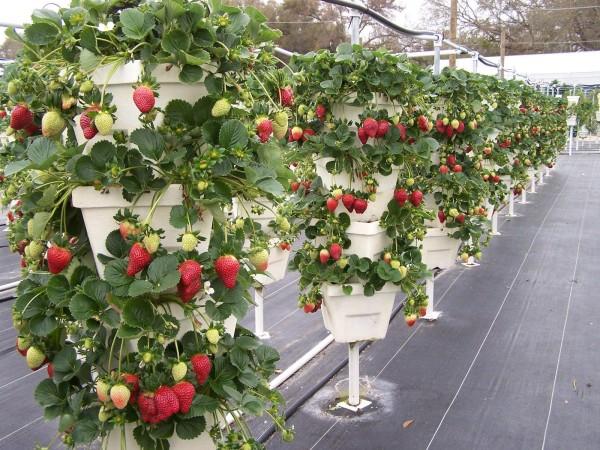
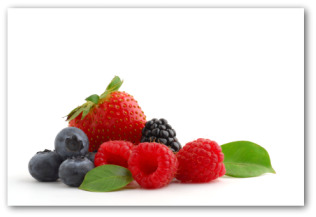
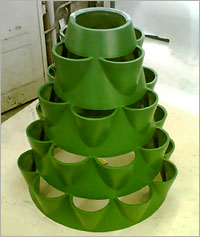
А вот такие делают уже промышленным способом,которые годятся и для красивых клумб  (200x235, 46Kb)  (200x237, 28Kb) 
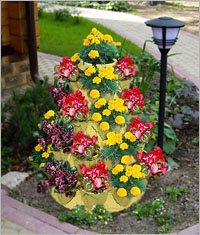
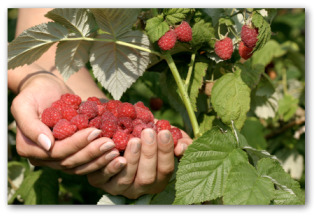
PS Глюк что ли сегодня какой ,не могу нормально фото расположить. Но что есть-то есть((     http://www.liveinternet.ru/users/muter/post157624669/

Monday, April 11, 2011

Growing Berry Shrubs


Red raspberries produce a main crop in midsummer, while some varieties such as 'Heritage' produce a second crop in fall.


Blackberries make the perfect edible hedge, keeping unwanted visitors out of your yard while yielding quarts of rich, flavorful berries.


Not only will blueberries produce an abundance of fruits in late summer, the foliage turns a brilliant red in autumn, adding to the fall foliage show.


Red currants make an attractive shrub while producing juicy, tart fruits that are great for jams, jellies, and juice.
When you think about growing berries, strawberries are likely the first fruit that comes to mind. While these luscious berries are a favorite addition to an edible landscape, there are other berry-producing plants that not only yield an abundance of fruit, they also make attractive landscape plants. A gooseberry bush will fill the fruiting gap between the last strawberries and the first red raspberries, and will still be ripening fruit when the raspberries have finished. Midsummer brings on the red and white currants and blackcap raspberries. After that come the blackberries and then blueberries, and finally the everbearing red raspberries, which ripen until frost.
Also, many of these berries make excellent shrubs and hedges. Grow blueberries, currants, and gooseberry bushes as foundation plantings along your house or as an informal hedge in the backyard. Grow thorny brambles, such as blackberries and red raspberries, along a fence or wall or as a hedge to keep cats, dogs, and wildlife out of your yard. The fruits on these bushes are attractive even if you don't like the flavor. Birds and other wildlife will enjoy any you forget to harvest. Also, the foliage of some berry shrubs, such as blueberries, turn a brilliant color in the fall.

Why Berries?

Compared with apples, peaches, or any of the tree fruits, bush and bramble fruits are easy to grow. They rarely require spraying for pests, and they begin bearing some fruit the year after planting. By their third season they should be in full production. Perhaps most important, they're very space efficient. None require a mix of varieties for cross-pollination.

Berry Basics

With the right culture, berries will reward you handsomely. First, aim for a mix of different types to extend the harvest season, then plant small numbers of each kind and care for them well. Buy the smallest number of plants you can as you're learning.
Incorporate lots of organic matter before planting, and mulch with shredded leaves or compost every year. Prune regularly through the season to keep each branch or cane as productive as possible. Here are some specifics on growing these delicious, attractive fruits.

Gooseberries

Gooseberries grow on dense bushes that reach 2 to 4 feet tall without training. They're hardy throughout most of the United States except in the southwestern deserts and the inland valleys of California. Best fruit production occurs in the mid-Atlantic and northeastern U.S.
Gooseberries leaf out early in spring. The foliage is a lustrous green, turning bronze to red in fall. Branches are covered with straight, 1-inch-long spines. The ripe fruit is either translucent yellow-green or dusky purple to red, depending on the variety. When ripe, the fruit is juicy and sweet with a pleasing acidity. As with any fruit, there are marked varietal differences in flavor.
Gooseberries are one of the few fruits that hold their quality well on the bush when ripe. The earliest gooseberries (which can be picked green) fill the brief gap between the last strawberries and the first red raspberries. When the berries reach about 1/2 inch in diameter and are still hard and a month from being ripe, they're excellent for pies and other cooked desserts. This early harvest thins the fruit so the ripe berries will be larger.
Gooseberries, especially the unripe fruit, are high in pectin; you can make very thick jam with no added pectin. A mature plant can produce from 5 to 8 quarts of fruit, so one plant may be all you need. Where space is extremely limited, train gooseberries against walls as fan-shaped or horizontal espaliers. These espaliers provide year-round interest, and picking will be easier, too.
Gooseberries bear fruit near the base of 1-year-old shoots and on short spurs on older wood. So no matter how carelessly one prunes, there's always some fruit. Remove about 20 percent of the oldest growth — wood that's been growing for three to five seasons — each year. Also cut out enough of the newest growth to make the plant open and easy to pick. Always save some vigorous new shoots to become future main branches. Any new shoot can be cut back to 4 to 6 inches with little loss in fruiting potential.

Red Raspberries

A 30-foot row of raspberries, trained to single stems against a wall or fence, will yield about a quart of fruit every other day for three weeks, and that's plenty of raspberries for most people. A more traditional hedge-type planting will yield twice that amount, although it takes at least twice the space. Intensively trained berries are extremely productive. To get the most from red raspberries, plant at least two kinds: a main crop variety for heavy early summer harvests, and a fall (or everbearing) type to close out the berry harvest. Where the season is long, you may need to plant two fall varieties to keep you picking until frost.
The popular 'Heritage' variety, for example, will be finished in early September in USDA Zone 6, with about four weeks of potential ripening weather left. It's a mistake to cut raspberry canes back in an effort to make the canes self-supporting. The most fruitful buds are those nearest the top of the canes. You'll get the best results by tying the canes to two wires at 2-1/2 and 5 or 6 feet off the ground, depending on the vigor of the variety. Main-crop raspberries fruit on 1-year-old canes. After harvest, cut them out at ground level to favor the new canes. When you've got vigorous new canes growing about 6 inches apart, remove any new ones that appear through the growing season.
Fall raspberries fruit on new canes at the end of their first growing season and again the following summer. For heavier fall crops, prune the canes to the ground after the first harvest in autumn and forego the summer crop from fall varieties.

Black Raspberries

Although closely related to the reds, blackcaps have a distinctive flavor, ripen a little later, and require slightly different training. Black raspberries spread by bending the tips of their canes to the ground where they root, leapfrogging along at 2 to 3 feet a year. New shoots arise only from the original crowns, not willy-nilly from the roots as with red raspberries. Also, there are no fall-fruiting black raspberries. In most other respects, they're very similar to the reds. In an attempt to bend to the ground and root, the canes elongate and become thin and weak at the tips. Unless you want to start new plants, cut these canes back to 3 or 4 feet. They'll be self-supporting, with no loss of fruiting potential. Cut the old canes out after harvest. Since black raspberries don't throw root suckers, they take much less thinning than reds.

Currants: Black, White, and Red

Judging by flavor alone, most people would regard currants as two totally different fruits: the fresh, tart reds and whites versus the strangely pungent and heavy blacks. But they're close botanical relatives, and because they ripen about the same time and their culture is almost identical, it's best to consider them together.
Red currants are one of the most beautiful fruits. When the berries are ripe, the plant literally drips with long clusters of gleaming scarlet beads. Each red berry (white currants are just a different color variation) has a transparent skin, so sunlight makes it glow from within. Currants are very juicy and quite tart. When fully ripe, you can enjoy them right off the bush, the way you would eat any other berry. Traditionally, currants are used for jelly, jam, and cooked desserts. Ripe currants will hold on the bush for much longer than most other fruits without dropping or losing quality.
Black currant bushes are slightly larger than red currants, and the fruits are not as conspicuous. Black currants are meatier, less juicy, and when eaten fresh they're definitely an acquired taste. Cooked, however, they lose their musky overtones and make one of the finest-flavored jams of all.

Blackberries

Blackberry culture began in North America, although there are flavorful species native to Europe and Asia. Today's improved varieties have mixed heritage, part American natives and part Eurasian species. Blackberries are far and away the heaviest bearing of the bramble fruits, producing about twice as much as red raspberries. They ripen in midsummer after the raspberries are finished, and are more heat tolerant than raspberries.
Blackberries are robust plants that need to be restrained or they can become weeds. They grow and can be trained much like red raspberries. However, since they throw root suckers so vigorously, you may want to confine their roots with metal or fiberglass barriers sunk 1 foot or more below ground level.
Blackberries are much more thorny than reds or blackcaps. Where space is restricted, or if you don't have the patience to pick fruit from these prickly plants, choose one of the relatively new thornless varieties, such as 'Chester'. Many of these are trailing in habit, so you'll need to rig a wire trellis to train them up. There are also new blackberry varieties that fruit on the first year canes similar to everbearing red raspberries. 'Prime Jim' and 'Prime Jan' produce in late summer the first year and can be mowed down each fall for easy maintenance.

Blueberries

Blueberries are a relatively new fruit, domesticated only within the last 75 years. They probably would have been tamed sooner if people had understood their need for an acid soil. Brought from American wild lands into gardens, the fruits almost always died because the soil had been limed. Blueberries demand a soil pH between 4.0 and 5.5. Correct the pH for blueberries with peat moss (mixed at least 50/50 with your native soil) and perhaps some soil sulfur. The bushes have extremely shallow root systems, so the heavy peat blend need not be deeper than 12 inches. Blueberries need a steady supply of moisture; the water-retentive peat will help with that as well.
One blueberry bush is all you need. In its fourth season it will produce a pint or so of fruit. At maturity, when it's 4 to 6 feet tall, the right variety can produce up to 20 pints over two to three weeks. However, if you've room for three or four varieties, you can stretch the harvest to 8 to 10 weeks, into the fall raspberry season. Although cross-pollination isn't essential, it will encourage larger fruit.
Blueberries are extremely handsome shrubs, notable for their brilliant fall color and bright stems in winter. Some of the newer varieties are low and shrubby. These half-high varieties, such as 'Northland', make excellent shrubs to work into a perennial border or a low-growing flower bed. For gardeners in warmer climates, try growing Southern blueberry varieties, such as 'Misty', or rabbiteye blueberries, such as Tifblue'. These are more adapted to the summer heat.
When planting in the landscape, keep blueberry bushes away from masonry walls and foundations, where the soil can be excessively alkaline. If you mix them into a shrub border or with other plants, be sure to amend the soil pH so they can thrive. Other than netting to keep birds away, they are carefree fruits that will give you years of production.    http://www.garden.org/ediblelandscaping/?page=berry-shrubs

Saturday, April 9, 2011

Guide to Growing Strawberries


Guide to Growing StrawberriesThis is a fruit which is usually popular with all the family and it is worth growing not only for dessert but also for jam making and deep freezing.
A sunny slope from which cold air can drain freely is the ideal, for frost damage can be a problem, but most of us have to make do with less satisfactory sites. The best results, so far as soil is concerned, are obtained on rather rich loam that has been deeply dug and enriched with well-rotted stable or farmyard manure.
Planting can be done in late summer or early autumn or in March, but spring-planted strawberries should not be allowed to fruit during the first year. Space the plants 2ft. apart in rows 2-1/2ft. apart. The best results are obtained from one-year-old plants and after three years they should be discarded. Strawberries are shallow-rooting plants and do not take kindly to weed competition; so perennial weeds should be eliminated from the ground, as far as possible, during the propagation stages.
The planting operation must be done with care for the crown of each plant must be kept at surface level and the roots spread out to their fullest extent. Firming the soil round the roots is also very important.
Spread black polythene sheeting or clean straw around the plants and under the leaves in May to keep the fruits clean. At this time, too, cover the bed with fish netting or other suitable protective material to avoid losses from birds. If there are signs of mildew or other diseases and straw has been used, burn this when all the fruit has been gathered. This will burn off the old foliage but new, disease-free leaves will soon appear. Remove all runners unless these are wanted for propagation purposes.
If the plants are covered with cloches in March they will produce ripe fruit in late May in sheltered areas, but make sure that the soil does not become dry when giving this protection. By using cloches and choosing your varieties carefully the season can be spread over six or seven weeks in summer, with more fruit in the autumn if perpetual-fruiting varieties are grown.
The perpetual-fruiting varieties flower continuously from May onwards, and produce good- sized and well-flavoured fruit in the autumn in abundance. However, they will only do this if the first blossoms are removed, and only the later ones allowed to fruit.
Alpine and perpetual-fruiting varieties can be planted closer together (about 9in. apart) and be allowed to form a matted bed. They throw runners which start to flower and fruit in the same season if allowed, but the flowers from these runners should be taken off if strong plants are required for the following year. Strawing is said not to be necessary because they hold their fruit high, but in practice I find that it is still more satisfactory to protect them in this way. Providing the plants with the protection of cloches in the autumn will result in larger fruits of better colour.

Propagation

Increase strawberries from the plantlets formed on runners, choosing the best and planting out the young plants in late summer or early autumn. The plantlet on each runner nearest the plant should be chosen in each case, the rest being removed. It is better to remove the unwanted runners before they grow to any size and deplete the parent plant of its energy. Between four and six should then be left on each parent plant. The runners are pressed down with a bent piece of wire. The best months for this job are June and July and the plantlets should be well rooted by the end of August and can then be severed from the parent plants. They should be left in position for about a week longer and then transferred to their permanent quarters.
Some gardeners are reluctant to propagate strawberries themselves because of the proneness of these plants to virus diseases, and the decision is not made any easier by the difficulty of positively recognising some forms of virus attack.
Some of the perpetual-fruiting strawberries do not make runners freely and must be increased by division at planting time. Alpine strawberries, which produce their small fruits over a long season, are raised from seed sown in a warm greenhouse in February or in a frame in March or April, the seedlings being planted out after a few weeks of hardening-off in a frame.

Varieties

These include Cambridge Favourite, early to mid-season (good for cloches). Royal Sovereign, early to mid-season (strong grower and runs to leaf on heavy soils; first-class flavour). Talisman, late mid-season (produces a second crop in a mild autumn with cloche protection). Redgauntlet, mid-season. Hummi Grande, mid-season (a new variety from Germany which produces exceptionally large berries of good flavour). Alpine variety: Baron Solemacher. Perpetual-fruiting varieties Sans Rival and St Claud.  http://www.gardeninginfozone.com/guide-to-growing-strawberries

Growing Strawberry Plant – How to Grow Strawberry Plants

Growing Strawberry Plants

growing strawberry plantsA hundred years or so ago, strawberries were much more diversified than they are today. Over the years the species have lost their identity and become merged with the modern hybrids. This is sad in some ways because of the loss of taste and flavour. Our native wild strawberry Fragaria vesca and F. chiloensis, and its variety F .c. grandiflora, the pine strawberry, have all played their part in the building up of the modern strawberry. These were grown on special walls known as a strawberry wall, and mounds to get the best flavour.
Amongst them could be found white, cream, mottled and red berries and some with greenish-pink fruits. The disadvantage of these old varieties was that the fruit was coarse, large and very irregular in shape; a good many pounds had to be gathered to get one good bowlful for exhibition. Another failing was the large calyx and the fact that, in some varieties the plug was not easily detached and the fruit had to be nibbled off. All this was fine for discriminating individuals but when produced commercially and distributed by the ton, or used for freezing and canning, a greater uniformity in size and shape of berry was essential.
The variety Royal Sovereign, more nearly contains all the ideals than any other variety. However, it has certain disadvantages being more a variety for the southern half of the country than for northern districts because of its liability to disease where rainfall and humidity are high.
On the whole, however, the strawberry is a very adaptable plant and I have grown it at an elevation of 1,300 ft in a peat bog with excellent results. A deep root run is essential for strawberries and some of the older growers claim that the roots will penetrate to a depth of 2 ft. At the same time it does make surface roots which can be damaged by too deep cultivation.
Where strawberries are grown for exhibition, or to produce extra fine berries for the table, there is nothing to beat the mound or ridged system where the soil is kept up by stones, bricks or thick wooden planks. The object is to produce a deep well-drained soil with a free circulation of air around the clusters of fruit, which should be held clear of contact with gritty soil. To this end, such methods as growing strawberry plants in barrels are used. Incidentally I believe this was first used aboard sailing ships, and illustrations in old books appear where lettuces, endive, and other plants are shown growing in the same way to produce fruit and salads to combat scurvy.

How to Grow Strawberry Plants

In general, strawberries object to artificial fertilisers and prefer large quantities of manure, compost, leaf-mould, fish and bonemeal instead. On heavy soils, basic slag is ideal for digging into the soil when preparing a bed, and I would never dream of preparing the soil for planting strawberries without putting in a good double handful to the square metre. On thin heavy soils, I find that it pays to plant on ridges made up in the same way as for any other crop with the difference that the ridges are not subsequently knocked down. The method is to dig one spit forward and one on each side on top of this, adding manure to the middle and central trench.
On dry soils and in situations where it is not possible to have a strawberry bed as such, I like to use the raised bed method in the same way as alpines can be grown in chalky soils in a border of heaths and azaleas. An enclosure is made with three or five large stones about 18 in in height. The bottom is broken up and a good forkful of manure added. Then the space within the stones is filled with a good compost equivalent to John Innes No. 2 and three or five plants accommodated. The flowers look attractive and the berries hang down and colour on the warm stones to produce immaculate fruit. This is a technique which can be used in small gardens and as a variation an, alpine strawberry or perpetual strawberry may be planted in the middle of this group, for there is no real reason why strawberries must be grown in rows.
Lifting them up in this way in a flower border provides interest and variation as the next enclosure may be of something entirely different. Under ideal conditions, strawberry plants will continue to bear from three to six years but after the third year the berries, although more prolific, become smaller. On one commercial planting I know of, they used to allow them to go to six years and the fruits were almost entirely used for jam making. Today, three, or at the most four years, is considered the profitable limit.
When you want to know how to grow strawberry plants and you want to be sure of good quality strawberries, it is a good proposition to have three beds or three rows which will be made up of maidens, two-year-old and three-year-old plants. And, where space allows, as the three-year-olds are dug up, they are replaced by a new batch, not on the same bit of land, but on the other side of the three rows or beds.

Strawberry Runners

strawberry runnersStrawberry runners may either be taken from the two or three-year-old plants, it makes no difference, but I stress again that they must be taken from healthy plants.

Strawberry Pests and Diseases

Good cultivation will go a long way to keeping down disease, but there should be no sentiment about keeping a plant which begins to look sick and smaller than the others. I find there is no point in trying to treat individual plants for any sort of disease or stunting which may take place. The best thing is to fork them up, burn the plants and soak their stations with a good disinfectant.
The list of pests and diseases which attack the strawberry is a long one, but in my opinion one of the worst is the aphid. This not only debilitates the plant but, in the case of the shallot aphid, causes severe damage by dwarfing the plants, curling the leaves and distorting the blossoms. Perhaps most serious is the fact that aphids are vectors of virus diseases. In the ordinary garden, not one person in a hundred thinks of regularly spraying strawberry plants, but in my opinion that is most important and would more than halve subsequent troubles. It is also important when selecting runners to dip these in a good insecticide.
Leatherjackets and cutworms (surface caterpillars) can also play havoc with young and established strawberry plants alike, attacking them both above and below ground. If this is a problem HCH dust should be used.
Amongst the diseases botrytis or grey mould is possibly the most serious but this can be controlled by using captan or thiram. But it is essential to spray early and certainly not later than petal fall. Where special rings are pushed into the ground to support the trusses (these consist of a wire circle supported by a short cane) no strawing or matting is required. A free circulation of air round the fruit is provided and is, I think, preferable to strawing.

Strawberry Favourite Fruits

growing strawberry plantYou may have guessed from my enthusiasm, that I find growing strawberry plants very enjoyable and that strawberries are my favourite fruit, but it is also a fruit that can be grown practically anywhere under almost any conditions in town or country.
If so desired, they can be grown in pots, boxes, window boxes and even in hanging baskets. Furthermore they can be had over a longer period than perhaps any other fresh fruit. Advantage can be taken of a long fruiting season by planting early, mid-season and late varieties plus perpetuals and alpine strawberries.  http://www.gardeninginfozone.com/growing-strawberry-plant-how-to-grow-strawberry-plants

Growing Red Currant Bushes and White Currants

Red Currant Bushes and White Currants

Because more exotic fruits are readily available in the shops and with the introduction of frozen fruits out of season, red currants and white currants are not nearly so widely grown and used as in former years. Where red currant jelly is appreciated as a compliment to lamb or mutton, they will always be grown but the eating of red and white currants when cooked in their green state is not so widely appreciated as it should be. Curiously enough, this delicacy was at one time so widely relished in this country that it was carried to the New World and from thence is now coming back home as something new.
red currant bushes
One of the detractions even in the best of the red and white currants is not so much the slight acidity of the fruit but the preponderance of seeds. This is often more apparent when they are cooked than when eaten as a dessert. This objection disappears if the fruits are eaten green and before the seeds become woody. The other advantage is that this provides one of the earliest of the fresh fruits from the garden and those currants remaining, benefit from the thinning.

Growing Red Currant Bushes / White Currant Bushes

The red and white currants have another advantage over all the small fruits except the gooseberry, in that they may be trained as fans, cordons and espaliers against a wall or on wires. The advantage of being able to train them on walls is that for the earliest fruits they should be given a sunny position and to extend the fruit until early September they may be grown in complete shade. Provided the fruit is netted, or the birds leave them alone, the fruit will hang without harm for five or six weeks after being completely ripe. More often than not fruit is spoiled by honeydew. This is a deposit from aphids which can be severe pests but regular spraying gives control and the fruit is kept bright and appetising.
Red and white currants will fruit on old wood, the base of spurs of old wood and on new wood, but the best and biggest strings come from the base of new or current growth which has been spurred back to about three or four buds. Both red and white currants are grown on a leg, as described for gooseberries and this is obtained by removing the lower half dozen buds from the cuttings.
In the bush form, red and white currants are best pruned after leaf fall and trained to produce a goblet or wineglass-shaped bush, with about eight to ten main growths springing from a central trunk. The side growths are shortened back and about a half to one third of the length cut from the tips, making a bush about 3 1/2 ft high. When trained on a wall or on wires, the main branches can become more or less permanent as in the case of apples and pears and will in some cases reach a height of up to l0 feet. Every so often these growths should be cut out and replaced by younger wood.
Fortunately they will grow in any soil and both red currant bushes and white currants are readily propagated from cuttings of ripened wood inserted in a V-shaped trench of sandy soil from late September onwards. They can be purchased as two or three year-old plants and early planting in late October or early November is essential if they are to carry a little fruit the first year. Unlike the blackcurrant there is no need to cut them back hard, but merely to shorten back the leaders if this has not been done at the nursery.
The berries on even the large-fruited varieties will deteriorate if not fed and to do them justice they should receive an annual topdressing of farmyard manure in the spring and at least one application of a compound fertiliser such as Growmore during the growing season. Where fairly large quantities of bush fruits are grown, the weeds may be kept under control by chemical spraying or by seeing that the ground is clean and spraying with a pre-emergent spray during the early part of the year. This will give control from all except deep- rooted perennial weeds and these can be individually treated by hormone weedkillers.
However, for the ordinary household only one or two red currant bushes and white currant bushes are required and these will provide green fruits for one of the finest fruit salads you could possibly make, and also supply currants for dessert, for making cooling drinks and for jellies. A very palatable wine as well as red currant tea can be made from the fruits also.

Varieties of Red Currant Bushes / White Currant Bushes

There is not a great choice of varieties, Laxton’s No. l is probably the best as this has the largest red berries with the smallest seeds, is a heavy cropper and will continue bearing for many years. Laxton’s Perfection is another good variety with darker fruit and is suitable for exhibition as it hangs well into late August. Fay’s Prolific is early, sweet, dark red and will provide the first of the sweets when green.
Two good varieties of white currant bushes are White Versailles and White Pearl. Both these have very thin skins, large berries and make a very pleasant dessert.  http://www.gardeninginfozone.com/growing-red-currant-bushes-and-white-currants

Growing Fruit in Containers and Pots

Growing Fruits in Pots

Growing Fruits in Pots and Containers
The growing of fruit in pots is a very old practice which has come back into favour over recent years. The full range of fruits may be grown including apricots, apples, pears, cherries, plums, peaches, vines, figs, nectarines, citrus fruits, strawberries and so on. No great demand on space is made and greenhouses are available for other activities at various times of the year. The growing of fruit in pots allows the production of limited quantities of superlative quality fruit in areas which may be so bleak and exposed that outdoor culture is impossible. It is also useful for the production of fruit for the show bench.

Only greenhouses of good design and well situated to receive full sunlight should be considered: a greenhouse partially shaded by a vigorous peach or vine is not really suitable, although if it is a lean-to structure and a peach is grown on the rear wall, pots may certainly be grown in the front portion. Fruit in pots is an interesting and tempting subject for the conservatory that is also used for recreation. It is not generally necessary to think in terms of artificial heat, except perhaps the very minimum in the coldest areas. The pots are placed on the greenhouse floor — soil, ashes or concrete — and frequently on bricks to prevent supplementary rooting.

Type of bush

A restricted growing habit is essential, which involves the use or training of specially shaped trees grown on dwarfing rootstocks obtained from a reliable nurseryman. The skilled gardener can start with a ‘maiden’ (one year grafted) on a dwarf root stock and shape the tree, but it is generally better to buy specially shaped trees from a nurseryman, and better still if the bushes are already established in pots, three years old, and well furnished with buds so that fruiting can start immediately. With maidens it takes time to build up the framework before fruiting commences.

Cultural procedure

growing fruit in containersDelivery of trees is best taken in the autumn at dormancy or leaf fall, when they are potted up into 23cm (9in) pots. It is unwise to put a small bush into a large pot of 25-30cm (10-12in) diameter, as the secret of success with pot-grown trees is root restriction, though as the trees get older 30 cm (10-12in) or even larger pots. The pots used should be very sturdy and have drainage holes in the sides as well as in the base. Only the heaviest gauge plastic pots should be used, it being necessary in some cases to put one inside the other to impart sufficient strength, boring holes in the sides with an electric drill. If new clay pots are used they must be soaked well before use, and all pots must be scrupulously cleaned by washing. All pots are given a deep layer of drainage in the form of broken pots of pebbles over which is put a layer of coarse peat or coarsely shredded peat.
Much is made of the need for a good turf-based compost derived from stacked turf and it is unlikely that this can be bettered by any of the modern composts. Through the loam for apples and pears should be mixed onc-third part of very well rotted farmyard manure or well-made, reliable garden compost. For apricots, peaches, nectarines and figs avoid the farmyard manure but add bonemeal and lime at 114g (4oz) and 56g (2oz) per 36 litres/bushel respectively. The compost should be well mixed and under cover for a few weeks before use, finally adding some coarse bone-meal plus a liberal scattering of ground limestone. The compost should be sufficiently moist, rendering it so by watering if necessary.
Shorten all vigorous lateral and downward growing roots before potting up with great care, packing the compost in with a potting stick in layers until it is 2.5cm (1in) below the rim of the pot.
After potting the trees must be well watered and placed in a sheltered situation at the foot of a sunny wall, the pots of `hardy’ trees being plunged to their rims in good soil or ashes or alternatively protected with straw or peat to avoid damage by freezing, care being taken that they are not waterlogged. Hardy trees — apples, pears, plums and cherries — can remain out of doors until the buds begin to swell; apricots, peaches, nectarines, vines, figs and citrus fruits are better brought into the greenhouse immediately after potting, being given plenty of room and ventilation.

Seasonal treatment

While the culture of fruit in post demands considerable care and attention to detail, it is remarkable what can be achieved by regular watering and feeding; indeed, because of the limited root area the importance of this cannot be over-stressed. It is also essential that free ventilation should be given in the morning and excessively high temperatures avoided, particularly during the initial period of stoning in the case of peaches and nectarines. Assistance with pollination of all trees is desirable, using a rabbit’s tail or cotton wool.
Regular spraying is essential to encourage healthy growth of leaves and to discourage attacks of red spider, which can have a disastrous effect. Feeding with liquid manure should be practised after the fruits are set, once fortnightly at first, increasing the applications to once weekly later. As soon as the trees are in full growth a top dressing of equal parts of well rotted farmyard manure and soil should be given and moulded up round the edge of the pots, raising their height several inches to allow watering. Alternatively rings of linoleum or other suitable material can be used to contain the top-dressing material effectively.

Pruning and fruit thinning

In spring and summer there should be reduction of new growth. With apples and pears lateral growths should be pinched back to about 10-13cm (4-5in) or less, leaving only a proportion of them in the case of apples, otherwise the tree will become a tangled mat of growth. Peaches and nectarines, which fruit on new wood, should have well-placed shoots selected and allowed to make reasonable growth before having the tips pinched out. Some thinning of fruit will be necessary, leaving only one fruit per cluster on apples and pears and thinning plums out singly every 5-8cm (2-3in) or more, while peaches and nectarines should only be allowed to form one fruit per reasonable area of tree to avoid overcrowding. Figs should only have their shoots thinned. Apples and pears can be taken out of doors when the fruit is ripening and the pot plunged in soil for safety and conservation of moisture. Wind damage can be avoided by securing each fruit with raffia to a convenient branch.
After fruiting, all types of trees are ripened off by placing out of doors, carrying out any re-potting in mid autumn. Annual repotting is advisable in many cases, moving vigorous trees to a slightly larger pot. Again, the hardy trees can remain out of doors in a sheltered spot but the rest should be brought into the greenhouse.
Pruning is carried out by reducing the laterals in apples, pears and plums to within two or three buds of the base, and on trees such as peaches, which fruit on new wood, leaving only a proportion of well-placed sturdy shoots to bear the following year’s crop.
Specific pest and disease control is best; there is generally not the same need for the routine practices necessary with bushes out of doors.
  http://www.gardeninginfozone.com/growing-fruits-in-pots-and-containers

Thursday, April 7, 2011

Growing Strawberries, How to Grow Strawberries, Planting Strawberries


growing strawberries

The best tips for growing strawberries in backyard vegetable gardens. Learn how to plant, care for, and maintain June-Bearing, Everbearing, and Day Neutral strawberry plants w
hen gardening at home.


Strawberries can be part of a permanent garden area that includes such delicacies as asparagus, perennial onions, blueberries, and raspberries.
Another excellent idea for growing strawberries if you lack a lot of gardening space is planting them in a pyramid garden.
A terraced garden that is approximately 6 feet in diameter will hold 50 strawberry plants or a combination of vegetables and flowers along with the strawberries.
You use corrugated aluminum bands to form three planting terraces which are each six inches deep.
Purchase covers and netting to protect your crops from the weather and pests.


Types of Strawberry Plants

There are three types of strawberry plants: June-Bearing, Everbearing, and Day Neutral.


Growing Strawberries at Home


Strawberries grown in the home garden are generally sweeter and more flavorful than any bought in grocery stores.
Strawberries are very perishable, and freshly picked, ripe strawberries taste better than those that are several days old.
Commercial growers grow varieties that travel without bruising which eliminates the June-bearing varieties we mentioned above.


June-Bearing Varieties of Strawberries


growing strawberries

June-Bearing strawberry plants send out runners, which are side-shoots that will grow into new strawberry plants if left unchecked.
Allow some of these runners to grow into new plants to enlarge your strawberry row.
The new plants that will grow from the runners can become successive plantings to replace the older plants.


This type of strawberry plants produce one large crop per year over a 2 to 3 week period in the late spring or early summer.
June-Bearing strawberries are the most typically grown plants. They produce one flush of flowers, and produce many strawberry runner.
You can purchase early, middle, and late season varieties of June-Bearing strawberry plants. This type generally produces the largest strawberries.


Surecrop

Surecrop is a dependable variety and one of the easiest to grow. The giant-sized, delicious berries retain their firmness and wonderful flavor.
This type is chosen by many growers for its vigor, hardiness, and dependability. The high-yielder averages almost three pints of berries per plant.
The plant earns its name by being a consistent producer. Good selection for freezing.


Sparkle

Sparkle is a late-midseason abundant producer.
The plants are very hardy, productive, and dependable.
The plant produces glossy, crimson-red berries with exceptional taste and quality.
Perfect choice for serving fresh, freezing, and preserving.


Everbearing Strawberry Plant Varieties


growing strawberries
This type of strawberries provide two or three fruit harvests off and on during the spring, summer and fall. Everbearing strawberries do not send out many runners.

Ozark Beauty

Ozark Beauty is known as one of the greatest producing everbearing strawberries.


This variety produces continuous crops with tremendous yield.
You can expect big, firm, juicy, scarlet red berries that will retain these qualities throughout canning and freezing.
The plants are self-pollinating and their vigorous vines thrive in any soil.
Berry production continues from early summer until frost arrives.


Quinault


  • Quinault is one of the largest growing strawberries.

  • The berries often grow to the size of teacups.

  • The deep red, firm berry is a delight for eating fresh, making mouth watering desserts, freezing, or preserving.

  • This variety is one of the most disease resistant varieties of growing strawberries available.


  • Alexandria


    growing strawberries


  • Alexandria produces a modest yield all summer long until fall.

  • The growing strawberries thrive for years with minimal attention.

  • This variety does not send out runners but grows neatly up to a foot tall.

  • Their fruit is deep-red and sweet tasting.


    Day Neutral


  • This type strawberry also produces fruit during the entire growing season.

  • Day neutral plants also produce few runners.

  • Both day neutral and everbearing varieties are useful when you have limited space.

  • However the fruit on these varieties of growing strawberries is usually smaller than the fruit on the June bearer varieties.

    How to Grow Strawberries from Seeds


    In order to have fruiting size plants in May, the seeds must be sown indoors in December.
    Sprinkle the contents of one seed package onto the surface of a 6 inch pot filled within a quarter inch of the top with potting soil.
    Cover the seeds with 1/8 inch of peat moss and bottom-water.
    growing strawberries

    Growing Strawberry Seedlings

    When first true leaves appear, transfer the seedlings to six-packs. When they grow to about two inches high, put them in individual 3 inch pots.
    Early in April, set the plants into the cold frame to harden off.
    The growing strawberries can be planted outdoors later in the month.
    Beginning late in May the plants grow an abundance of white flowers, followed by the first fruit in early June.
    An ideal spot for growing strawberries is above a low railroad-tie retaining wall.
    You may want yours to edge a garden walk, to grow in a strawberry barrel, or add interest to a rock garden.


    Growing Strawberries from Transplants

    Strawberry transplants of all varieties can be purchased online or at your local garden center at the appropriate planting time in the spring. Follow the planting and spacing instructions that come with your transplants, as it will vary depending on whether you are planting day neutral, everbearing, or June bearing plants.
    Set June-bearing strawberry plants into the ground as early in the spring as possible so they can be well rooted before the arrival of warm weather.
    Prepare the soil the previous fall by covering it with a two inch layer of cow manure and four inches of compost.
    In the spring, dig both of these materials into the soil. Spread 10-10-10 fertilizer on the surface of 1 ½ pounds to 100 square feet.
    A slightly acid soil condition is ideal for growing strawberries.   http://www.vegetable-gardening-online.com/growing-strawberries.html
  • Growing Raspberries, Planting Raspberries, How to Grow Raspberries


    growing raspberries

    The best tips for growing raspberries in your backyard vegetable garden. Learn how to plant, care for, prune, and harvest raspberries when home gardening. Grow raspberries as an edible border if you are short of gardening space.


    Of all the delicious fruits grown in the home garden, raspberries are the most productive.
    This is an added bonus because growing raspberries at home is about the only way to get them to the dinner table in perfect condition.
    The small red fruit is difficult to raise and ship commercially because they are so easy damaged during handling.


    How to Grow Raspberries

    Usually raspberries ripen in midsummer on canes that grew the previous year.
    You can select the variety Durham, an everbearing type that produces two crops of berries annually.
    One crop is harvested in early fall and another the following summer from the same cane.


    Planting Raspberries


  • Choose a sunny, well-drained location.

  • Set the bushes, which are typically purchased from the local garden center, into garden soil enriched with peat moss and cow manure.

  • Sprinkle a little 10-10-10 fertilizer around each raspberry plant for a speedy start.

  • Do not expect more than a handful of raspberries in the first year.

  • However, after a year or two they will make up for it by providing you with a bountiful harvest for many seasons.

  • growing raspberries


    Raspberries in a Perennial Garden


    An ideal spot for growing raspberries is in a perennial fruit and vegetable garden.
    Other plants to consider planting are blueberries, asparagus, perennial onions, and strawberries
    Set perennials according to height in rows or blocks.

    Grow Raspberry Plants as a Border

    If you are short of gardening space, but want to include raspberries, consider planting a border of raspberry plants.
    Choose a sunny, well-drained location.


  • To prepare the soil for the perennials, add lime, manure, and dig in a couple of inches of compost.

  • The diagram of your border can be carefully planned out throughout the winter as the vegetable garden is resting.

  • Spray the border every week during the growing season with an all purpose spray.

  • Using a soaker hose is a good idea to water the soil not the foliage.

  • This watering technique helps prevent plant diseases.

  • Every spring, add bone meal to the border to supply extra nutrients for the plants.

  • Wood ashes from a fireplace are a beneficial springtime regimen for perennials.


  • Planting and Growing Raspberries


    growing raspberries

    Full sun is preferred by the growing raspberries although growing raspberries will tolerate a few hours of daily shade.
    The garden bed should be well drained.
    After the initial fertilizing when preparing the beds, give the plants an annual feeding of 10-10-10 fertilizer at a rate of 1 pound to 10 feet of row.
    Set out 1-year canes about 2 ½ feet apart.
    As the canes become established, each one forms several suckers.
    Eventually a single row will become 3 to 4 feet wide.
    Pull up wandering suckers to keep the row within its limits.
    Remove any thin, weak stems that emerge.
    This helps make the patch more manageable by making it easier to reach the inner berries and to prune the canes.

    growing raspberries

    Pruning Raspberries


    Pruning growing raspberries is simple once you get the hang of it!

  • Once a year pruning, plus cutting back in spring is required.

  • Cut off the canes at ground level that bore fruit soon after the early summer harvesting is complete.

  • The new canes growing alongside the harvested canes will produce berries in the fall and again the following summer.

  • In early spring, shorten these tall canes by about a third, before they leaf out.


  • Supports are not needed for growing raspberries plants but a single line of stout wire or cord is sometimes used to keep the outer canes upright.

  • A constant mulch of well aged manure or compost helps retain soil moisture and prevents the soil from splashing the berries during rain showers.


  • Harvesting Raspberries


    If you have to tug at the berries when picking them, it means they are not ripe.
    The raspberries should slip easily from the stems at harvest time.  http://www.vegetable-gardening-online.com/growing-raspberries.html